Add Row
Add Element
cropper
update
NJ Remodel Guide
update
Add Element
  • Home
  • Categories
    • Remodel Playbook
    • Local Pros
    • Design Dreams
    • Eco Living
    • Toolbox Talk
    • Smart Spend
    • DIY Lab
    • Trend Watch
    • Maintenance Matters
October 13.2025
2 Minutes Read

Unlock Your Design Potential: Turn Your Mood Board into Stunning 3D Room Designs with AI

3D room design AI: Elegant bathroom with floral wallpaper.

Transformative Interior Design with AI

Are you a DIY enthusiast looking to bring your interior design dreams to life? Imagine turning your mood board into a stunning 3D room design without any specialized software or expertise. With the help of AI tools like ChatGPT, this is no longer just a fantasy—it's a reality!

The Magic of Mood Boards and AI

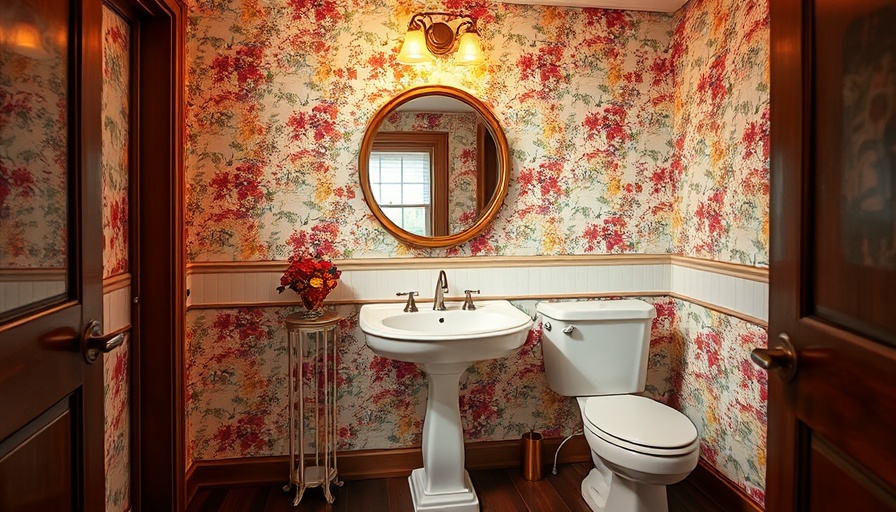
Creating a mood board is the first step towards realizing your vision for a space. It helps set the tone and color palette. But translating that vision into a physical space can sometimes feel overwhelming. This is where AI steps in, bridging the gap between concept and reality. By simply uploading your mood board alongside a photo of your room, you can instruct AI to generate a 3D rendering that reflects your ideas. For instance, using a prompt like "Create a 3D rendering of a sunny living room based on this mood board," allows ChatGPT to visualize your dreams in an instant.

Step-by-Step: Easy AI Room Design

Starting your AI-assisted room design is straightforward. Begin by creating a mood board—a task made easy with tools like Canva. Choose colors and styles that resonate with you. After saving it as a JPG or PNG, head over to your ChatGPT account. Upload your files and provide a simple prompt. As you navigate through this process, remember that AI renders your thoughts, so the clearer your instructions are, the better the design!

Tailoring Your Design

Once the AI generates a rough draft, it’s your time to play the designer! Whether it's adjusting the layout or refining colors, this is your opportunity to experiment. Don’t be surprised if some results are a bit amusing—it takes a few tries to hit the nail on the head! A tip for success is to keep your requests simple at first and adjust as you go along.

Why Embrace AI for Interior Design?

Embracing AI not only saves you time but can bear financial advantages too. Think of it as a trial run before committing to any costly renovations or purchases. It helps eliminate costly mistakes by giving you a visual reference to show contractors or friends. And isn't it awesome to imagine seeing your creative ideas come to life before making any actual changes?

Getting Started with AI Today!

With AI and mood boards at your disposal, designing your dream room has never been easier or more fun. Dive into the world of 3D renderings today and let your creativity flourish. It might just spark some major design inspiration for your next home project!

Remember, the journey to design success involves experimentation—so upload that mood board, let AI work its magic, and create a space that truly reflects you!

DIY Lab

7 Views

0 Comments

Write A Comment

*
*
Related Posts All Posts

Why Buying a Matching Furniture Set Can Stifle Your Home’s Personality

Update Why Matching Furniture Sets Can Be a Design Flop! Imagine this: you step into a room that looks immaculate, with every piece of furniture perfectly coordinated. But wait, why does it feel so... boring? This common conundrum plagues many homeowners who opt for matching furniture sets, often thinking they’re making a smart and cohesive choice. In reality, these matching pieces can drain a room of its personality. Breaking the Uniformity: Creating a Layered Look The mistake I made right after college was a classic rookie error. I bought a complete matching furniture set from IKEA, thinking I had all the bases covered for my first apartment. Sure, everything looked nice, but as soon as I moved in, the joy quickly faded. The uniformity made the space feel flat, like a pancake without syrup! Instead of a home filled with character, it was a showcase of sameness. Incorporating Contrast for Interest Let’s shift gears and take a look at Brent’s dining room. Initially, he thought he had hit the jackpot with his matching dining table and chair set. It looked good on paper, but the reality? The room felt monotonous. So, he decided to mix things up by swapping out one of the chairs for a different style and color. Suddenly, the dining area transformed. That single swap turned the table into a stunning focal point, sparking visual interest and depth throughout the space. Simple Tips to Avoid Matching Set Madness 1. **Mix and Match:** Don’t be afraid to combine different styles and textures. For instance, pair a modern couch with a rustic coffee table or blend contemporary chairs with a vintage dining table. 2. **Add Personality:** Showcase your style through unique decor, such as colorful throws, art pieces, and personal mementos that can bring life to a coordinated set. 3. **Start Small:** If you're hesitant to replace all your furniture, start by swapping out one piece. A new rug or lamp can also significantly impact the room's ambiance. Final Thoughts and Call to Action! So, next time you’re purchasing furniture, remember that a matching set might not be the best path to a charming home. Embrace a more personal approach by mixing different elements! If you’ve got a set that feels stagnant, consider selling a piece and reinvesting in something that gives your space the flair it’s been missing. Feeling inspired? Check your home for matching sets and start your journey toward a beautifully layered and unique living space today!

Unlock Potential: Decorate Your Awkward Corner with Style

Update Transforming Awkward Corners into Functional Spaces Many homeowners know the frustration of dealing with awkward corners—those minimalist spaces that seem to serve no purpose other than stare back at you in silence. But what if I told you that with a little creativity and some stylish ideas, these spots could be transformed into functional and aesthetically pleasing parts of your home? Let’s dive into creative solutions that can repurpose these nooks into design focal points. Julia's Corner: Tackling Unsightly Cords One of the most common issues in living spaces is an overwhelming mess of cords, particularly around electronics. Julia’s corner, filled with cables and a standard TV console, felt chaotic and unfinished. The solution? First, consider hiring an electrician to install an outlet behind the TV. This simple change can make a world of difference by allowing cables to be neatly hidden away. A longer TV console can further complete this set-up by providing visual balance, allowing Julia to keep her aesthetic while eliminating the clutter. Kelly's Fireplace Nook: Style Meets Function For Kelly, the challenge came from a deep fireplace nook that felt more like a void than a stylish element. One creative idea is to use this space for additional storage or décor. Consider installing floating shelves to display knick-knacks and greenery, or arrange a cozy basket display that adds texture and warmth. With a touch of creativity, even the most challenging spaces can shine! Design Tips from Pros: Verifying Your Choices Many designers emphasize that the scale and proportion of furniture pieces play a crucial role in making a space feel complete. For example, oversized furniture can suffocate a small room, while too-small pieces may seem lost in larger areas. A sectional sofa can fill a corner beautifully while offering practical seating. Meanwhile, a curated gallery wall can transform an awkward transition area into a captivating visual interest point. Simple Solutions that Pack a Punch Corral your creativity with the following stylish solutions: a compact bar cart can serve as both a statement piece and functional surface; a bold floor lamp can draw attention away from awkward angles; and vibrant indoor plants can be the perfect effortless accent to brighten up dark corners. The key is to embrace each space’s unique character rather than forcing conventional solutions upon them. Awkward corners don’t have to be a homeowners' nightmare. With smart design choices, any homeowner can turn these spaces into functional and stylish features of their home.

Mastering the Art of Refrigerator Deep Cleaning: Your Annual Guide

Update Deep Cleaning Your Refrigerator: Why It’s EssentialYour refrigerator works tirelessly around the clock, but how often do you give it the deep cleaning it deserves? Most people simply do quick wipe-downs, leaving hidden grime and food particles to accumulate in places that are out of sight. This annual refrigerator deep cleaning checklist outlines why a thorough cleaning is not just about looks, but about maintaining your appliance's efficiency and longevity. A Step-by-Step Guide to a Spotless FridgeTackling your refrigerator might feel intimidating, but breaking it down into manageable steps will make the process simple and even enjoyable. Prepare to engage with your home as you follow these guidelines:Step 1: Empty the Fridge - Start by removing all items from the refrigerator. Use this opportunity to inspect expiration dates, but don’t stress about individual item cleaning just yet.Step 2: Soak the Shelves and Drawers - Take out all shelves and drawers to soak them in warm, soapy water. This will help loosen any stuck-on debris.Step 3: Clean the Interior - With the fridge empty, tackle the interior. You might be surprised by how much food debris has accumulated. Using a soft scrub brush or cloth, wipe down the walls and corners. This is where a steam cleaner can really shine, loosening up those stubborn spills.Step 4: Clean the Door Seals - Don’t forget the door seals! These areas can harbor dirt and grime that affect your fridge's ability to seal properly. Wipe with soapy water and dry thoroughly.Step 5: Replace Everything and Purge - Once cleaned, reinstall all shelves and drawers. As you place items back, take the time to toss anything that's expired or growing questionable. This makes for a fresh start!Challenges and Solutions During Deep CleaningLet’s face it, during this cleaning, you may discover things that distract you—like strange odors or spills from who-knows-when. Stay focused and make it a game: how quickly can you clean each spot? Having the right tools, such as a vacuum cleaner for crumbs or a gentle scrub brush for tough stains, will make a world of difference.Tools and Supplies You NeedBefore you get started, gather a few essential supplies that will help hasten the cleaning process:Baking soda (for odor control)White vinegar (for cleaning surfaces)Soapy water (to clean shelves and walls)Paper towels and microfiber cloths (for drying)Vacuum cleaner or a soft scrub brush (for those hidden spots)Why This Matters in Your Home RoutineAn annual refrigerator deep clean is not just a chore; it’s an act of preventive maintenance that prolongs the life of your appliance and keeps your food fresh and safe. By investing 60 to 90 minutes each year in this aspect of home care, you’ll ensure your kitchen remains in harmony and everything runs smoothly. Plus, handling this major task can empower you as a homeowner and bolster your confidence in other DIY projects!Final Thoughts: Cleaning Beyond the SurfaceOnce you complete this deep clean, you'll not only enjoy a tidier fridge but also a sense of pride in maintaining one of your household's hardest-working appliances. Despite it feeling like a chore, consider this an opportunity to connect with your home and establish a memorable tradition! Mark your calendars for your next annual clean, and remember, maintenance doesn’t have to be complicated—it just has to be scheduled.

Terms of Service

Privacy Policy

Core Modal Title

Sorry, no results found

You Might Find These Articles Interesting

T
Please Check Your Email
We Will Be Following Up Shortly
*
*
*