Add Row
Add Element
cropper
update
NJ Remodel Guide
update
Add Element
  • Home
  • Categories
    • Remodel Playbook
    • Local Pros
    • Design Dreams
    • Eco Living
    • Toolbox Talk
    • Smart Spend
    • DIY Lab
    • Trend Watch
    • Maintenance Matters
October 17.2025
2 Minutes Read

Illuminate Your Home: Discover the Best Picture Lights for Any Space

Modern interior with picture light illuminating shelves

The Ultimate Guide to Choosing the Best Picture Lights

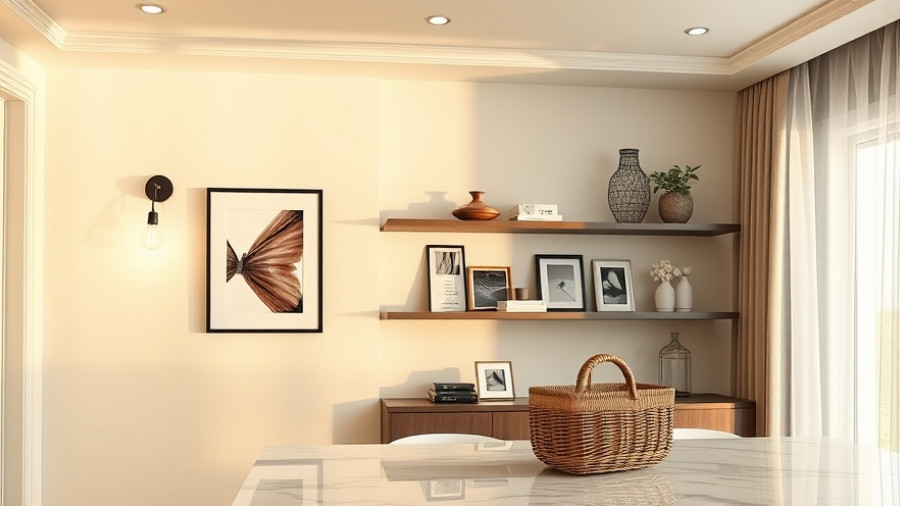
Picture lights are not just a functional addition; they add a touch of elegance and personality to your favorite artwork and shelves. For homeowners looking to transform their space, selecting the right picture light can change the entire atmosphere of a room. Whether you have a cozy corner with treasured photos, artistic pieces, or stylish collections, picture lights can make them shine brighter and enhance the overall aesthetic.

Understanding the Different Types of Picture Lights

There are three main types of picture lights you'll encounter, each with its own set of advantages:

  • Battery-Operated Picture Lights: Ideal for renters or non-permanent setups, these lights are easy to install and often come with a remote control. They can fit easily into tight spots without the need for wiring, making them incredibly versatile.
  • Plug-In Picture Lights: Slightly more powerful due to constant access to electricity, these lights need an outlet nearby. The downside? You might need to hide some visible cords for a cleaner look.
  • Hardwired Picture Lights: If you want that high-end designer look, this is your best option. These require professional installation but provide a seamless and permanent setup.

Choosing the Right Size Picture Light

Choosing the perfect size picture light isn’t just a trivial detail; it’s essential. For a harmonious look, aim for a light that’s about half to two-thirds the width of the art piece or shelf you wish to illuminate. This ensures that the light feels intentional and stylish rather than an afterthought.

Why Picture Lights Matter in Home Design

Picture lights play a key role in layered lighting, enhancing the ambiance and design of your home. They turn sparse or dull areas into warm, inviting spots, encouraging guests to engage more with your displayed items. By integrating different lighting types in your space, you can create a dynamic and functional living environment that adapts to various moods and activities.

Make Your Space Shine: Illuminate with Style!

Investing in good picture lights is more than just a decor trend; it's about elevating your home’s style and functionality. With a wide range of options available, homeowners can easily find their perfect match. Ready to light up your artwork or shelves? Explore the world of picture lights and find the one that will make your treasured items shine!

DIY Lab

3 Views

0 Comments

Write A Comment

*
*
Related Posts All Posts

Discover How to Choose the Best Area Rug for Your Home

Update Choosing the Perfect Area Rug: A Beginner's Guide So, you’re ready to buy an area rug! But wait, do you really know how to choose the best one for your space? Don’t worry, it can be fun and easy when you have the right tips in hand. This guide will help you figure out size, style, and materials to get the ideal rug for every room in your home. Size Matters: Finding the Right Fit First things first—size is key! A rug that’s too small can make your room feel cramped or unfinished. The general rule is to choose a rug that extends underneath the feet of your furniture. For example, if it's a living room, ensure that at least the front legs of your couch sit on the rug. Aim for around 12 to 18 inches of floor showing around the edges of the rug for a balanced look. Material Magic: Choosing Rug Fabrics Wisely Rug materials come in various options, each suited for different vibes and practicalities of your space. Here’s a few to consider: Wool Rugs: They’re soft, durable, and perfect for living rooms! Natural Fibers: Jute and sisal are eco-friendly and great for high traffic areas, but they can feel scratchy underfoot. Synthetic Rugs: Ideal for families with pets or kids—easy to clean and often stain-resistant. Stylish Choices: Patterns and Colors Your rug can set the mood of your room! Think about the color scheme of your decor. Do you want a bold patterned rug that pops or a soft solid that complements your furniture? Remember, light colors can make a room feel airy, while darker shades can bring warmth and coziness. Practical Tips: Online Shopping for Rugs Shopping for rugs online can be super simple! Just measure your space accurately and read reviews. Check if the store has a good return policy, just in case the rug isn’t what you’d hoped for. And don't forget—ordering a small sample first is a great way to ensure the color and texture are right for your home! Keep It Safe: Using a Rug Pad Rug pads may seem like an extra step, but they’re important! They help keep the rug in place, reduce wear and tear, and provide extra cushioning underfoot. Plus, they can prevent your rug from sliding around—safety first, right? Conclusion: Make Your Space Cozy and Stylish Now that you’re armed with these tips, you’re ready to find the right area rug to elevate your home decor! Don’t rush into it; take your time to choose wisely. The perfect rug is out there waiting just for you!

Unlock Your Design Potential: Turn Your Mood Board into Stunning 3D Room Designs with AI

Update Transformative Interior Design with AI Are you a DIY enthusiast looking to bring your interior design dreams to life? Imagine turning your mood board into a stunning 3D room design without any specialized software or expertise. With the help of AI tools like ChatGPT, this is no longer just a fantasy—it's a reality! The Magic of Mood Boards and AI Creating a mood board is the first step towards realizing your vision for a space. It helps set the tone and color palette. But translating that vision into a physical space can sometimes feel overwhelming. This is where AI steps in, bridging the gap between concept and reality. By simply uploading your mood board alongside a photo of your room, you can instruct AI to generate a 3D rendering that reflects your ideas. For instance, using a prompt like "Create a 3D rendering of a sunny living room based on this mood board," allows ChatGPT to visualize your dreams in an instant. Step-by-Step: Easy AI Room Design Starting your AI-assisted room design is straightforward. Begin by creating a mood board—a task made easy with tools like Canva. Choose colors and styles that resonate with you. After saving it as a JPG or PNG, head over to your ChatGPT account. Upload your files and provide a simple prompt. As you navigate through this process, remember that AI renders your thoughts, so the clearer your instructions are, the better the design! Tailoring Your Design Once the AI generates a rough draft, it’s your time to play the designer! Whether it's adjusting the layout or refining colors, this is your opportunity to experiment. Don’t be surprised if some results are a bit amusing—it takes a few tries to hit the nail on the head! A tip for success is to keep your requests simple at first and adjust as you go along. Why Embrace AI for Interior Design? Embracing AI not only saves you time but can bear financial advantages too. Think of it as a trial run before committing to any costly renovations or purchases. It helps eliminate costly mistakes by giving you a visual reference to show contractors or friends. And isn't it awesome to imagine seeing your creative ideas come to life before making any actual changes? Getting Started with AI Today! With AI and mood boards at your disposal, designing your dream room has never been easier or more fun. Dive into the world of 3D renderings today and let your creativity flourish. It might just spark some major design inspiration for your next home project! Remember, the journey to design success involves experimentation—so upload that mood board, let AI work its magic, and create a space that truly reflects you!

Re-Caulking Your Bathtub: A Simple DIY Project for Homeowners

Update Why Re-Caulking a Bathtub is a Game Changer Many homeowners overlook the importance of re-caulking their bathtubs. But not only does this DIY project refresh your bathroom's aesthetic, it plays a crucial role in protecting your home from mold and damage. Think of it as preventative care for your bathroom – a simple upgrade that can prevent costly repairs in the future. Specifically, a clean bead of caulk wards off water sneaking behind the tub, which can wreak havoc on your walls. It creates a watertight seal that enhances not just the look but also the health of your bathroom environment. Your Supplies Make All the Difference To kick off your re-caulking journey, gather the right tools and materials. A caulking gun, silicone caulk, utility knife, and painter’s tape are essential. More importantly, choose a caulk that is specifically designed for wet areas like baths and showers – silicone is often your best bet. While it can be more challenging to apply compared to acrylic latex, its waterproof properties make it invaluable for a long-lasting seal. Having these supplies at your fingertips will ensure a smooth and successful project. Step-by-Step: Get Your Caulk On! Ready to dive into re-caulking your bathtub? Follow these straightforward steps to achieve a professional-looking finish: Cut the Old Caulk: Using a utility knife, carefully cut away the edges of the old caulk. This first step will make the next part of the process much easier. Scrape It Out: Channel your inner handyman and scrape out all the gunky old caulk. It's a workout, but it’s vital that you don’t layer new caulk over the old stuff. Clean It Up: Once the old caulk is removed, it’s time for a thorough cleaning. A shop vac is useful for debris removal, followed by rubbing alcohol to disinfect the area. Tap It Off: Before applying the new caulk, protect your tub and tiles with painter’s tape for a crisp, clean line. Apply the Caulk: Load your caulking gun and apply a steady bead of silicone caulk along the joint. Maintain a steady pace for an even bead. Smooth It Out: Use a wet finger or a baby wipe to smooth and shape the caulk. This step is crucial for achieving that flawless finish. Let It Cure and Celebrate Your Success Once your caulk job is complete, it’s essential to allow it to cure properly before using the bathtub. A minimum of 24 hours is recommended to ensure a watertight bond. After you've waited, step back and admire your handiwork! Your bathroom will look fresher and cleaner, and you'll have the satisfaction of completing a DIY project successfully. Why Home Maintenance Matters Embracing small home maintenance tasks like re-caulking can lead to significant improvements around the house. Not only does it keep your living space looking polished, but it can save you from future headaches caused by larger issues. So, roll up your sleeves and give it a try – your bathroom will thank you! Are you ready to take on this DIY project? Check out your local home improvement store for supplies and embrace the proud satisfaction that comes with improving your home yourself!

Terms of Service

Privacy Policy

Core Modal Title

Sorry, no results found

You Might Find These Articles Interesting

T
Please Check Your Email
We Will Be Following Up Shortly
*
*
*